3/14/2014
Welcome!
This is a summary of the assembly of a ½ studio-scale model of the original Battlestar Galactica, created from a master mold by Mike Salzo. Out of the box, this thing is quite possibly one of the most perfect garage resin kits I've ever seen. In fact, I don't think it would be fair to actually call it a garage kit, as it looks way too professionally made, almost injection molded. Since I have been working on it, I have found no more than two (TWO!) surface bubbles that needed to be fixed. It doesn't even have that noxious smell that comes off a kit made from epoxy resin. I was fully expecting to be knocked over when opening the box for the first time and need to let it air out a little bit, but such wasn't the case, surprisingly. It is a beautiful kit, well constructed with great attention to detail.
When compared to the Mongram/Revell 1/4105 scale kit of the late 70's, we see the extreme scale differences between the two. When built, it is about 38.5 inches in length. In short, the Salzo kit is a monster!
My only real concern with this kit was the rather severe warping that the lower half of the "head" piece has experienced. This warping actually led me down a different kind of preparation process than how I normally approach a build. More on the head-warping later. (Later update: after dunking the underside of the head in a bucket of boiling water, I was able to unwarp the head to near-perfect straightness - problem solved)
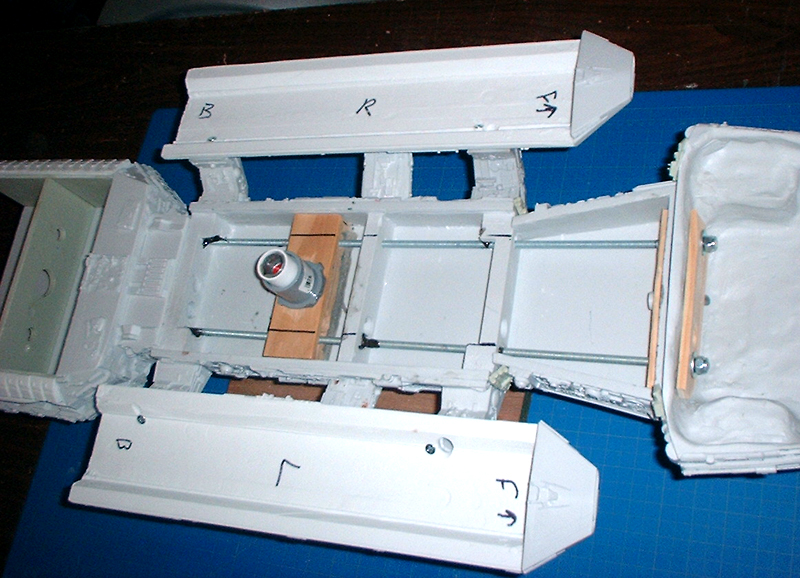
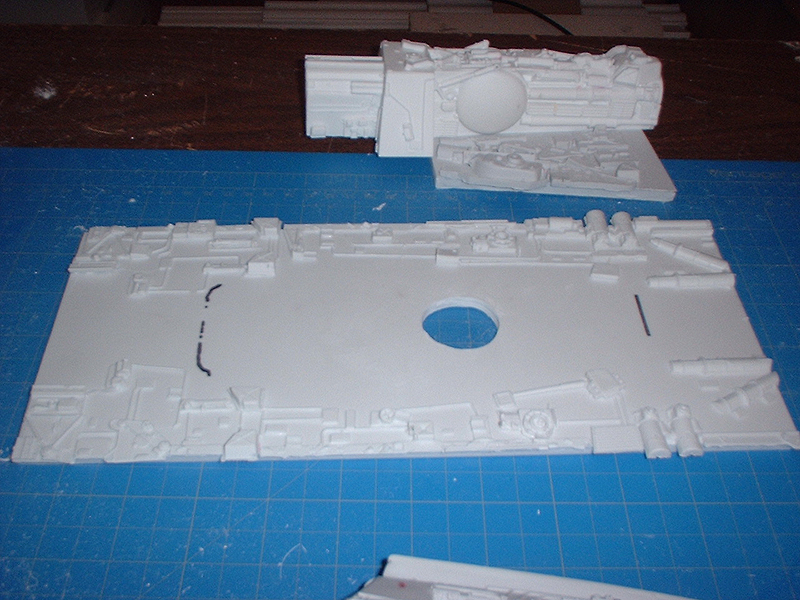
I decided that, since the model itself is rather simple in its design and construction, I would concentrate more on the logistics and engineering of how it should be assembled. I didn't want to permanently glue pieces together, as I may need to make repairs to internal lighting or other internals, so the main pieces of the model would be assembled using nuts and bolts. I used several images that Mike Salzo provided (on his thread at the Replica Prop Forum - http://www.therpf.com/) to get it started. Here are the initial shots of the body assembly:
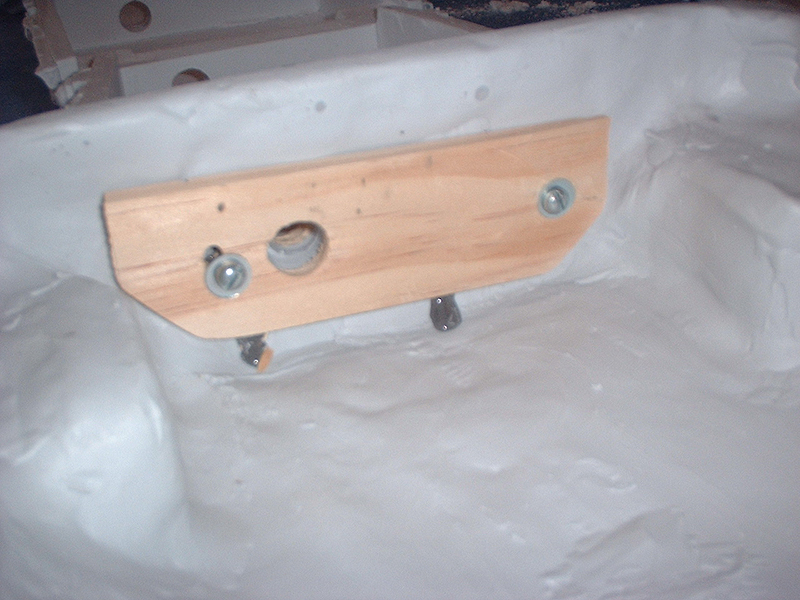
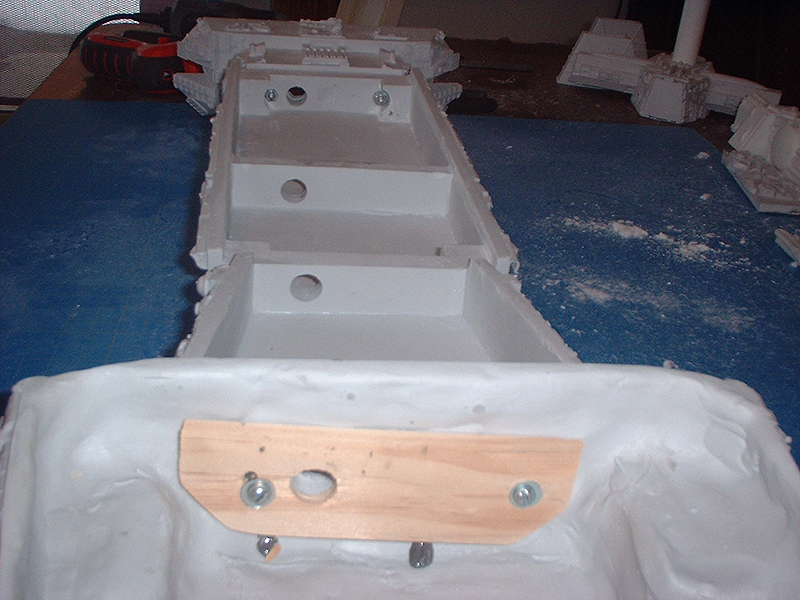
I used thin wooden pieces on both sides where the head joins to the neck, in order to act as a protective buffer for the bolts. The head seemed like it will be heavier than the engine area, necessitating the extra step - I didn't want it shattering the resin wall off the neck later on. Additionally, holes were drilled down the entire length of the model to allow wiring to pass unencumbered throughout for lighting.
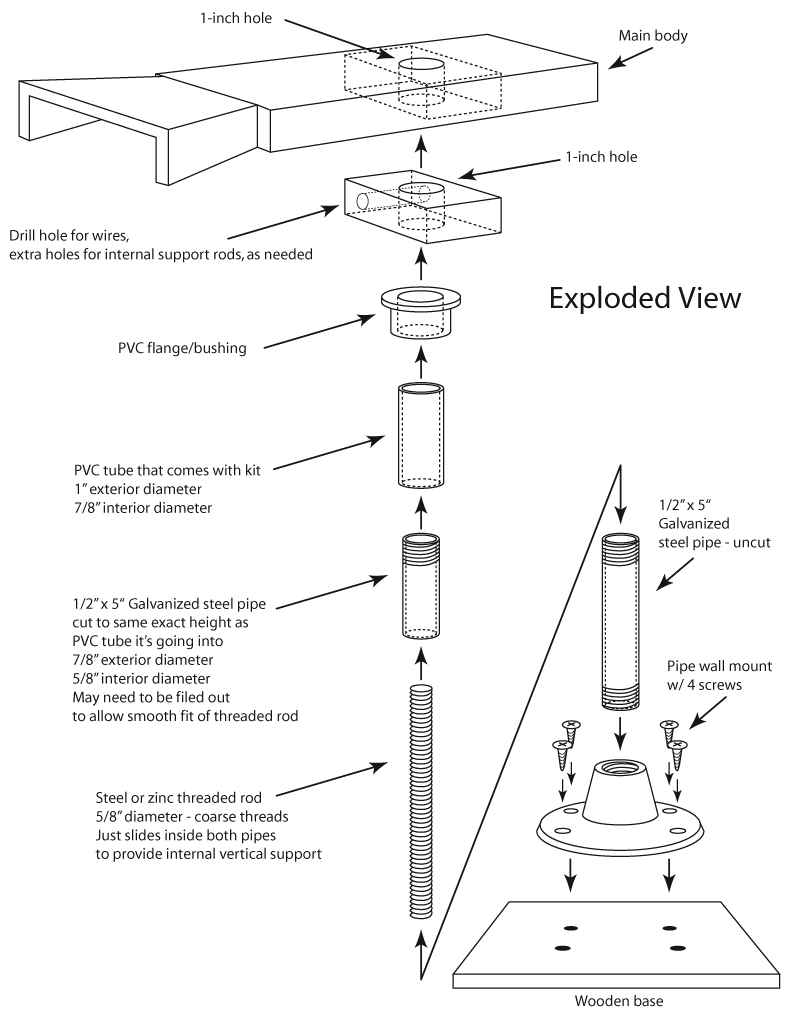
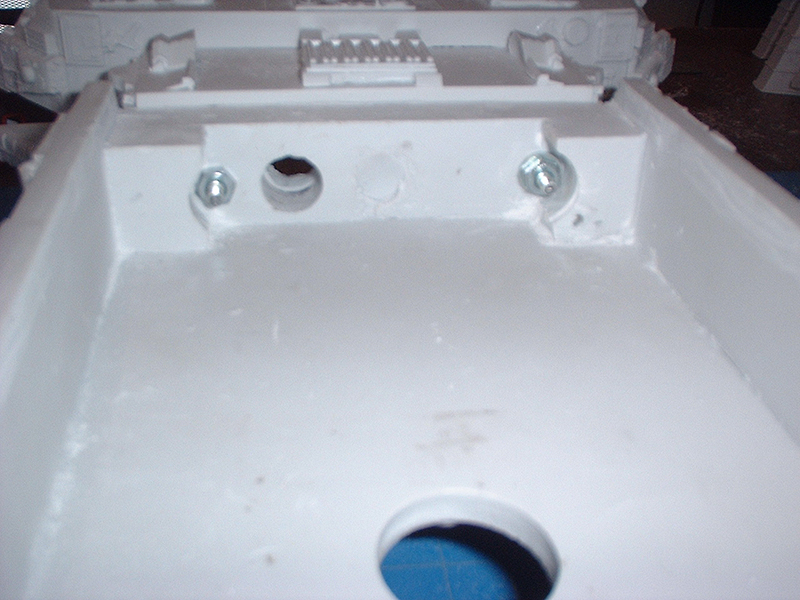
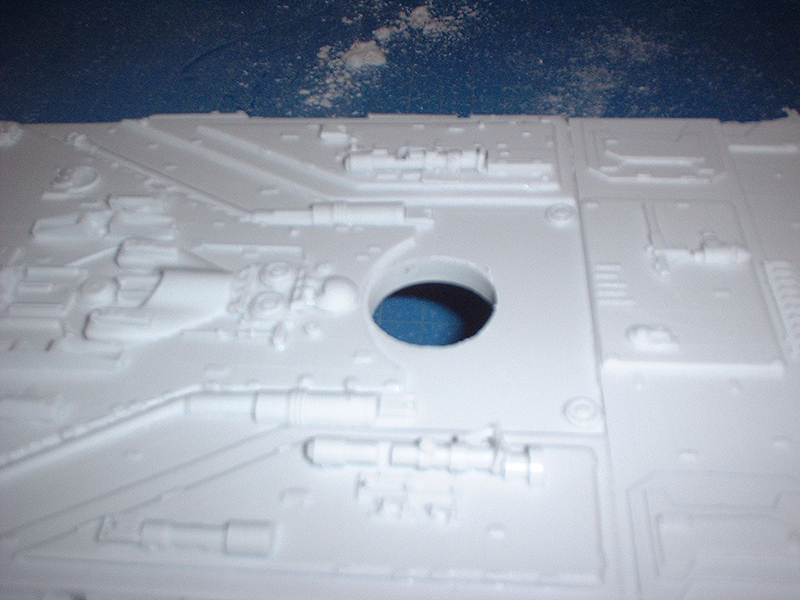
Then, I started drilling one-inch holes down the central axis of the model, as a conduit for the main stand tube that was provided for the kit. Three holes are needed - one through the top of the main body, one through the lower main body panel, and finally, at the bottom, through the "coffin" (a term used in studio-scale Galactica circles for the lower piece that looks like...well...a coffin).

Then it was time to build the stand and internal support structure. The prototype stand was quickly assembled just to serve as a support for the model as it's being worked on. I wanted to get it off the table as soon as possible, with the intent of preserving the surface detail. Too much sliding around on a surface, even the soft cutting mat, may wear down some greebles and I didn't want to take that chance.
Base pieces construction:
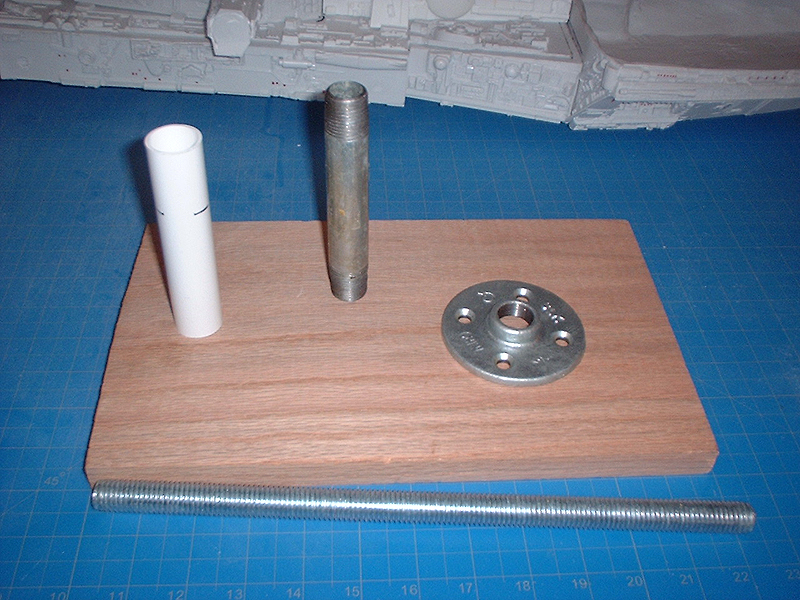
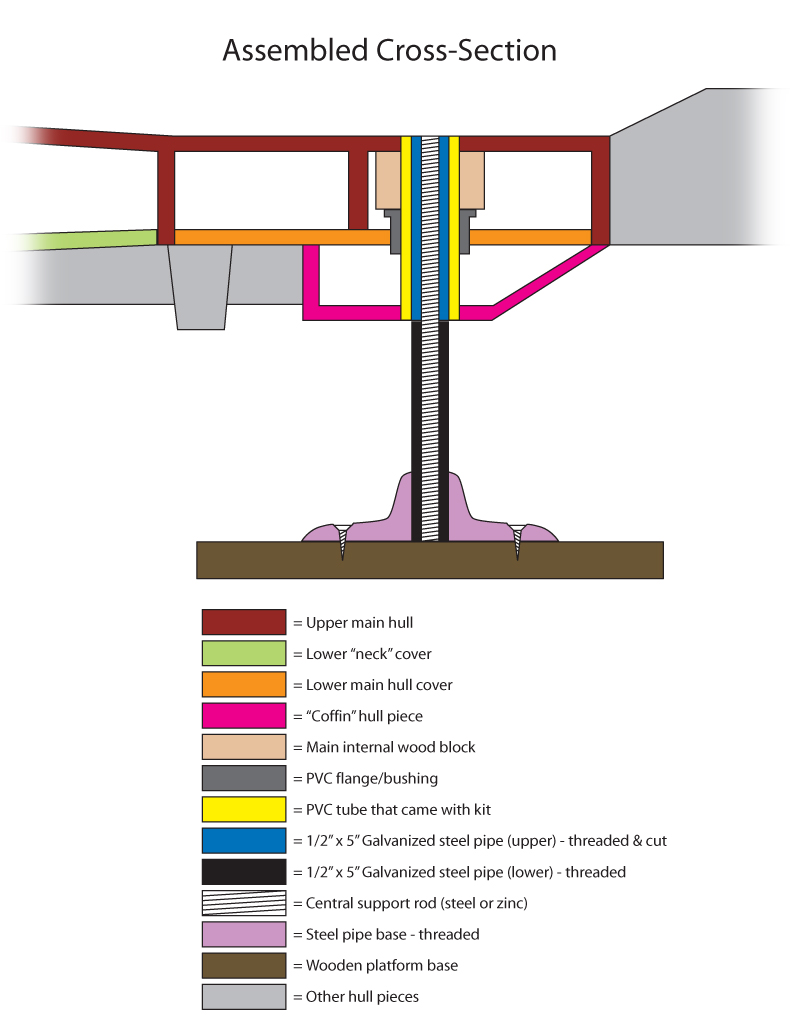
I then cut the height of the PVC tubing provided with the kit to make it flush with the full height of the model, along with the steel pipe I got from Home Depot. A second steel pipe would screw into the wall-mount base and the steel rod would be the main support running up the full length from the bottom of the base to the top of the model. The internal tube assembly would be put together with JB-Weld, a great binary resin adhesive that is like a rock once it's set. The final assembly looks like this:
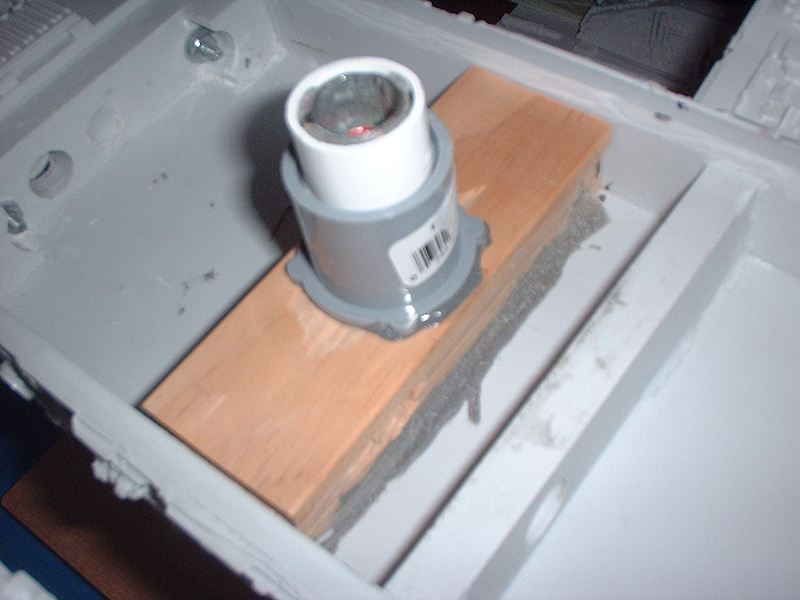
The beauty of this design, is that the steel pipe inside the PVC tube acts as a natural stop when it's set down on top of the second steel tube, of identical diameter, in the base in either direction (from the bottom or top of the model), so no other internal engineering is required to prevent the central rod from sliding through. The pipe is also wide enough internally, and free of obstruction and threading so that the model may rotate freely on the stand, and be removed easily without having to "unscrew" it from its base.

(The red dots, by the way, are where fiber optic lights are going to go. More on that later.)
Once the main support structure was complete, I proceeded with the assembly of other major components, including the engine box and landing bays.
The engine box was relatively easy to put together. Using the rectangular resin pieces included in the kit, I was able to put it together in rather quick order. Since resin isn't styrene and normal model glue won't work, I had to get glue specially made for resin work. Chemistry folks know them as Cyanoacrylate (CA) glues. After doing a quick search online, I found Bob Smith Industries (http://www.bsi-inc.com/) who has exactly the type of glue required for this model. Keep in mind, while using this stuff, it is like CrazyGlue on crack! It bonds instantly and it is a real pain in the butt if it gets on your hands. The less-viscous version (Insta-Cure) has a tendency to work its way outside of the area you want to glue and get into areas you don't want it to. Be very careful when using it. It can be a mess, but it is absolutely fantastic for this application.
Here is the finished engine box:
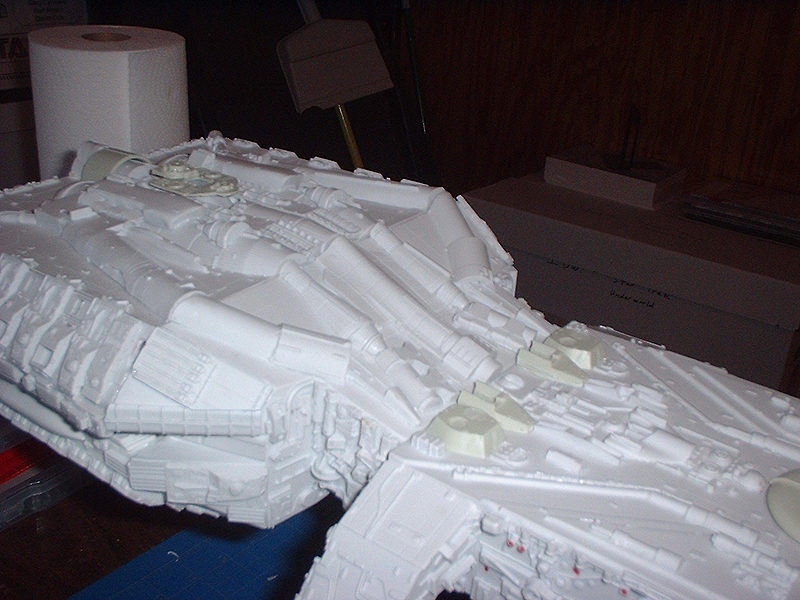
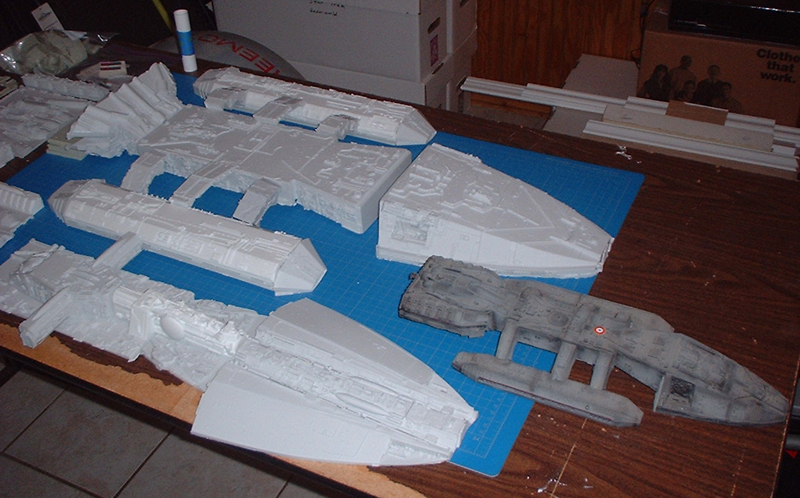
And the assembly of other pieces. She's really starting to look like the "Big-G" now:
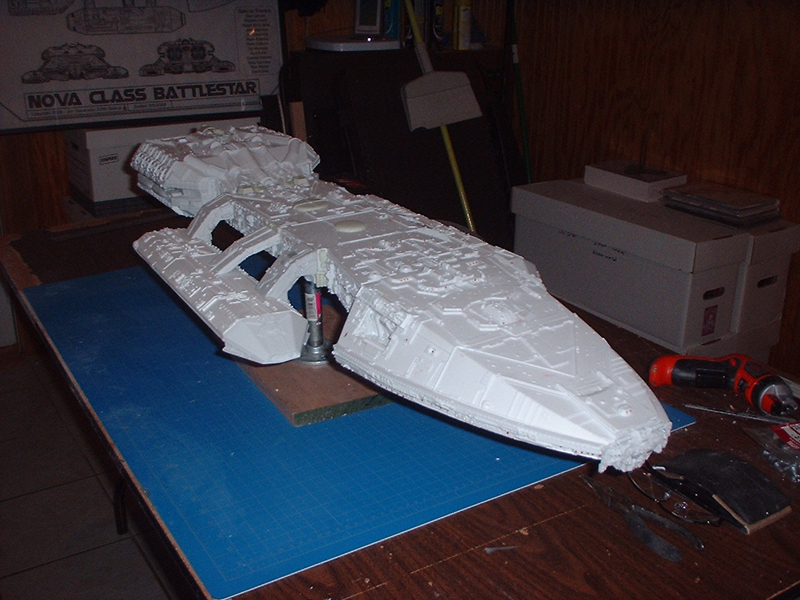
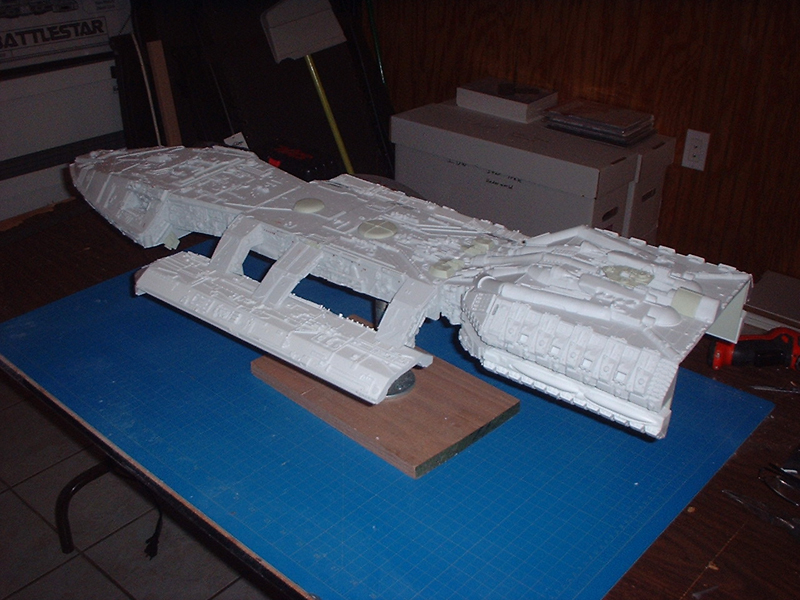
I left all the lower pieces off for now, as I still need to put in wiring and lights.
Well, that's it for now. More later as progress continues!